Some of my models and other products include PDFs that have optional graphics layers you can switch on and off to customize the final look of your model before you print it. This guide should help you get familiar with how multi-layered PDFs work, and hopefully you'll understand why your PDFs sometimes look bland (or even blank!) when you first open them. It just means you're a few mouse-clicks away from creating something uniquely yours.

Use the free program Adobe Acrobat Reader to open multi-layered PDFs. There may be other PDF readers that can access the optional graphics layers, but Adobe Acrobat Reader is the only one that Im sure about and so its the only program that I recommend.
It's important that you do not try to open layered PDFs in your internet browser; always download the files and open them directly from your hard drive.

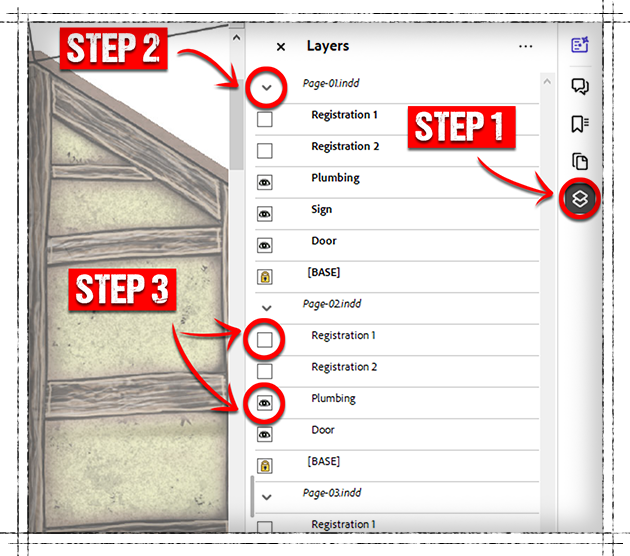
To adjust the layers, locate the Layers menu. You may need to click the Layers icon (Step 1).
Next, you will need to click the small caret symbol (Step 2).
Some layers will be visible by default, but some layers will not be visible. Youll have to click the small box next to the layer name so that an eye icon appears (Step 3) in order to make the layer visible.
Go through each layer turning it on and off to see what features you want to add or take away from your models before you print.

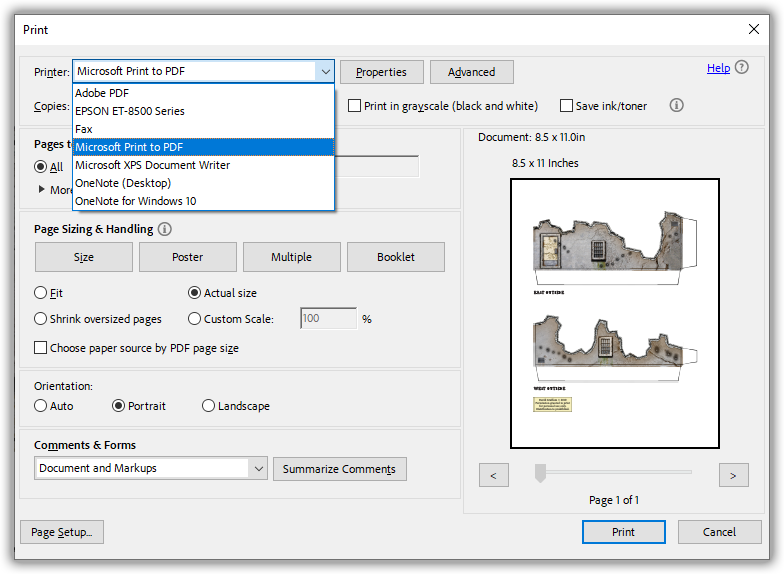
If you want to save your layer selections as a flattened PDF, download a PDF printer driver (there are several good ones available for free). When you have a PDF printer installed, while your PDF is open you can choose the Print function (just like printing to a normal printer) and then select the PDF printer driver as if it were another printer hooked up to your computer. This will let you output a flattened PDF with your layer selections preserved, which is handy if you want to transport your customized files to be printed at a print shop.


Some other frequently-asked questions around here are regarding the materials I recommend to get the best results when printing and assembling my models.
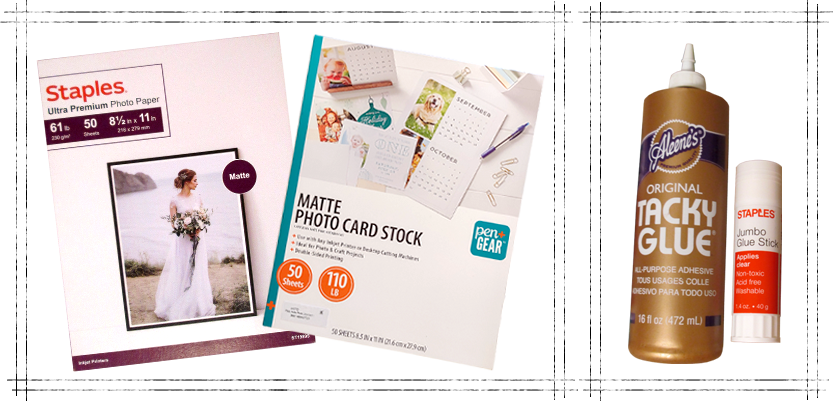
Matte photo paper or matte photo cardstock is what I like. Satin (semi-gloss) photo paper is okay too. What you're looking for is premium cardstock that isn't shiny. Think business card thickness, or even thicker. The terminology used to describe cardstock paper thickness is inconsistent and confusing, but as a rule of thumb, look for cardstock or photo paper that is 199 to 230 g/m² (or gsm) or cardstock that is described as 80 to 110 lb. My favorite matte photo paper is actually described as 61 lb. but it is 230 g/m² which is just about the heaviest cardstock you will find. Confusing, right? Considering all of that, my best advice is to try different kinds of cardstock until you find something you like.
There are many kinds of glue that will work just fine for papercrafting. My favorite is Aleene's Original Tacky Glue. Aleene's Quick Dry Tacky Glue is also good stuff. Really, most of the time you can use a good-quality glue stick, and in some cases a glue stick is the best way to cover a large area. Glue sticks are a must when mounting ground pieces and tile prints onto heavier material such as foamcore, cereal box cardboard, or illustration board.

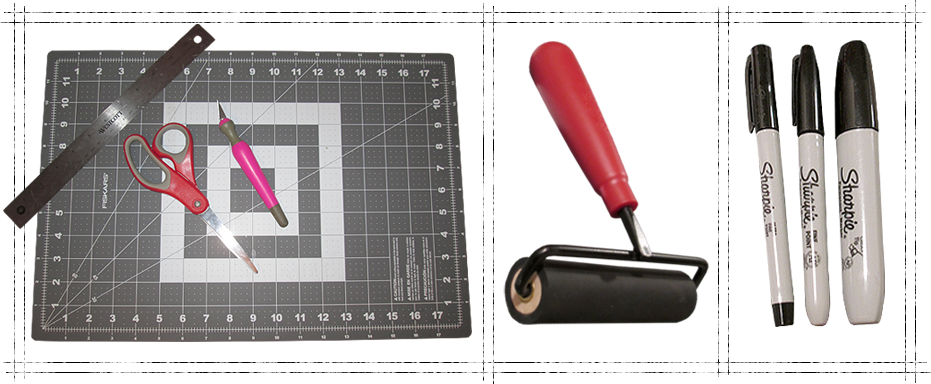
You're going to need some obvious stuff including a good pair of scissors and a hobby knife (X-Acto or hobby scapel). The ideal cutting surface is a 12 x 18 inch self-healing vinyl cutting mat. You'll also need a 12 inch cork-backed metal ruler. Along with paper and glue, those are the essential materials for papercrafting, and you can build almost all of my models with nothing more than those.
There are a few other supplies that you might consider adding to your toolkit. Felt-tipped markers can be used to darken the white paper edges of your models. Sharpie markers are probably the best-known brand, and I keep a selection of ultra fine, fine, and chisel point Sharpies on hand. Honestly, I don't mind leaving white edges on my models, but you might find that darkening the edges makes a big positive difference in the final look of your models.
Another useful implement is a rubber brayer, which is a rolling tool you can use to flatten large sections while glue is drying. If you're making tiles and mounting them onto heavier basing material, I highly recommend getting a brayer. I also find them useful when attaching the roofs onto my models.

A bamboo skewer is a cheap but invaluable way to push around small tabs where you want them, especially once the tabs have glue on them. The pointy end, flat end, and the shaft of the skewer all have utility, and they're especially useful when assembling small beams that are found on lots of my models. Just keep one of these nearby and you'll see how useful it can be in lots of situations.
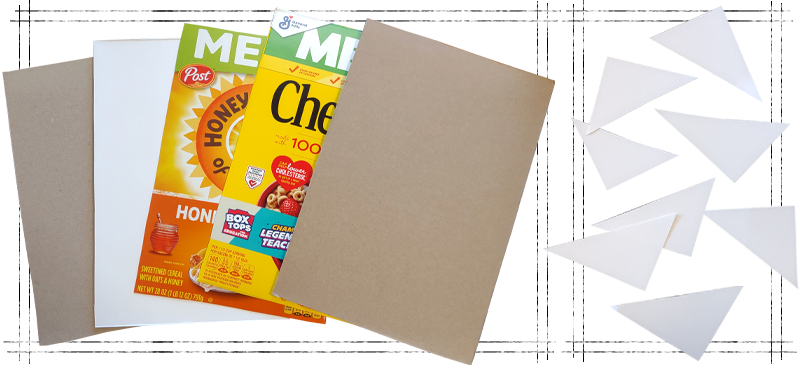
Start saving your cereal box cardboard and similar packaging to use as basing material for your models' ground pieces and tiles. In a pinch, you can use a sheet of inexpensive matte cardstock as basing material. Foamcore and illustration board can also be good basing materials, but are more difficult to cut.
Lastly, I keep scraps of cardstock and cut them into triangles about 2 inches to a side. These are really useful for spreading glue onto hard-to-reach areas, for removing excess glue, and for spreading glue evenly on tabs, and I don't feel bad about throwing them away after they've outlived their usefulness. I use these constantly when assembling papercraft models, and I recommend that you do the same.
If you've made it this far, you should be well-equipped to start building some models. Check out my free models to get right into it.
David Graffam © 2024
|
|